| CONTENTS |
| Sites |
| Front page |
| About me |
| My occupation |
| Galleries |
| Others |
| Selected links |
| Contact |
| Guestbook |
| Copyright © 2008-2010 Ebbe Holsting |
Pictures from Albert Maersk
- Vessel type: Container Ship
- Built at: Odense Steel Shipyard, Denmark
- Year of construction: 2004
- Length: 352,25 meters (1155,7 feet)
- Width: 42,8 meters (140,4 feet)
- Max draft: 15 meters (49,2 feet)
- Loading capacity (deadweight): 105750 tons
- Container capacity: 8272 TEU
- Reefer capacity: 703 Units
- Main Engine: Sulzer 12RTA96C 2-stroke diesel engine
- Main Engine output: 88346 bhp at 100 rpm
- Max speed: 25 knots
The following pictures are all taken by me, Ebbe Holsting, and are copyrighted. However, should you wish to use them in any way please contact me for permission. Thank you!
|
The stern of the Albert Maersk while alongside at Gothenburg, Sweden. Notice the radar scanner below the flag pole. This scanner is great for identifying objects aft of the vessel. It is especially used in areas with a high risk of piracy in order to identify fast-moving boats approaching the ship from behind. |

|
Halfway through the Suez Canal, southbound, we anchor up in the Great Bitter Lake, waiting for the northbound convoy to pass. This picture was taken December 29th, 2006. We spent Christmas in the Mediterranean Ocean, and New Year's Eve in the Red Sea, just south of the Suez Canal. |
|
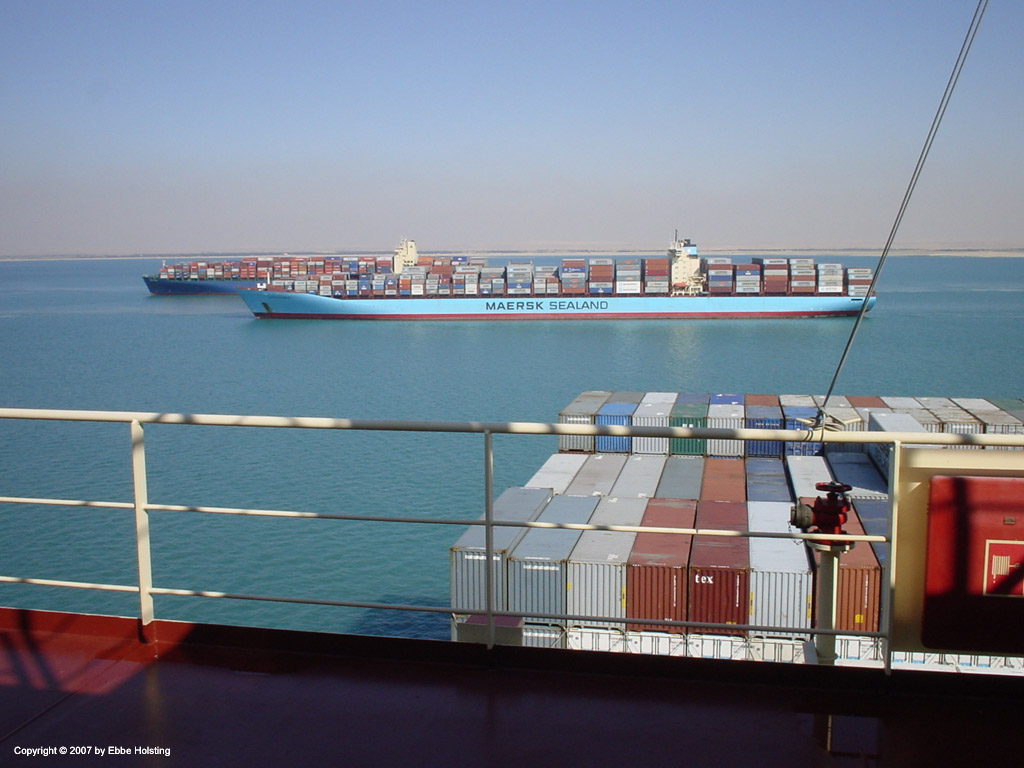
"Caroline Maersk" passing by aft of us with the rest of the northbound convoy. |

|
|
|
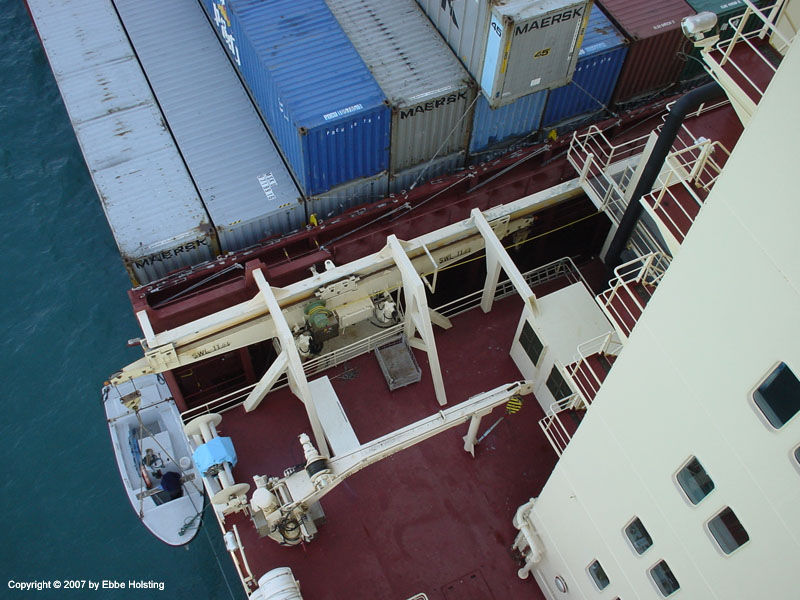
In the bottom left corner the Suez Boat is visible hanging from the monorail crane. A boat like this and a four-man crew are taken aboard any ship transitting the Suez Canal. In case of restricted visibility, rough winds or other hazardous situations, the boat and its crew asssist in mooring the ship in the Canal until conditions improve. |
|
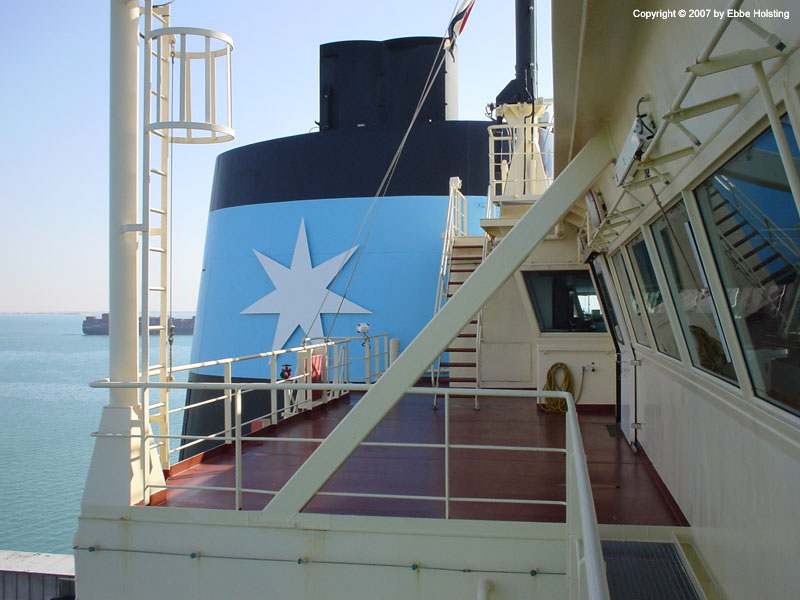
The aft part of the wheelhouse (bridge). The rectangular thing on top of the funnel is the actual exhaust pipe from the main engine. Apart from this pipe, the funnel also houses exhaust pipes from the diesel generators (auxiliary engines) and the oil fired steam boiler as well as a number of vent pipes from tanks in the engine room. |
|
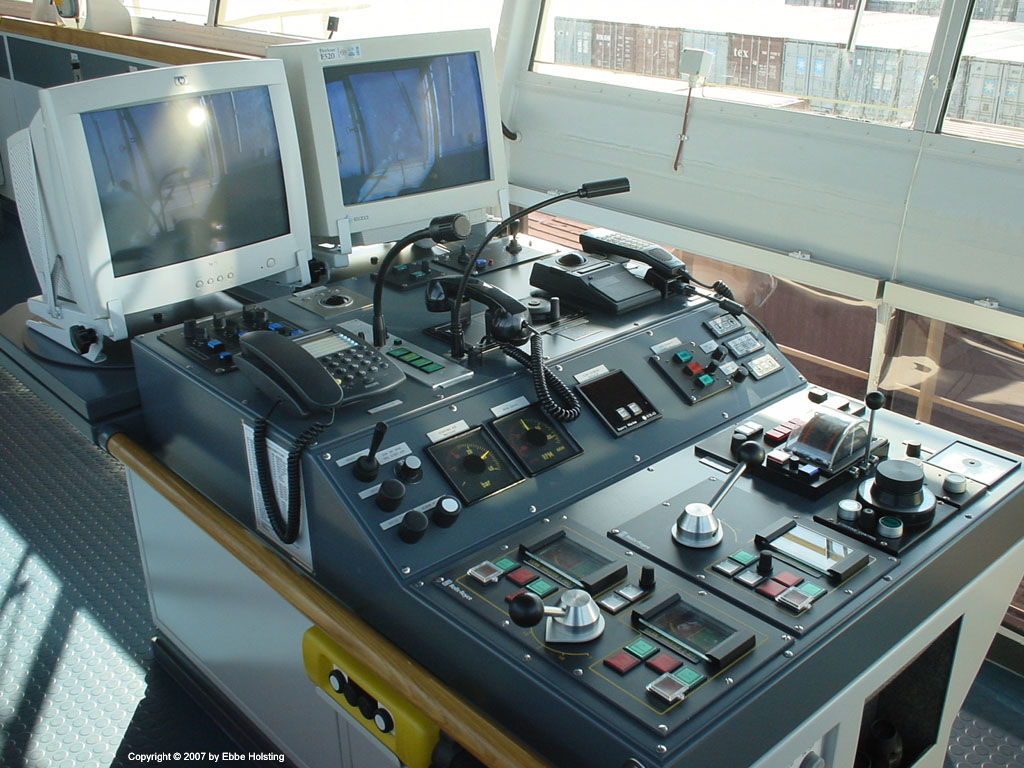
The steering console in the starboard bridgewing, used during arrival to and departure from port. The monitor to the left is for the radar, and the one to the right can display an electronic navigational chart, aiding the Captain in his manoeuvers. In the bottom right corner we have the controls for the thrusters, and in front of those we have the main engine telegraph. To the right of the telegraph is the "wheel" for steering the rudder. |
|
Steaming across the Indian Ocean, headed for the Far East, we met the Clifford Maersk, the very first vessel I ever sailed with. We actually stayed within a few miles of each other for a few days, before slightly different routes caused us to part ways. |
|
Testing the lifeboat in Nagoya, Japan, I had the opportunity to shoot this picture. Note the lifeboat davit swung out and the boat hooks hanging just above the water surface. A little to the right of the hooks the so-called "Pilot combination ladder" is rigged, ready for departure. The combination ladder consists of a rope ladder and a gangway, as seen. The bottom of the rope ladder is lifted well clear of the water to avoid unauthorized access to the ship whilst alongside. |
|
Taking the lifeboat for a trip around the stern of the Albert Maersk. The lifeboats are tested on water once every three months. In the bottom of the picture we see a solar panel used for charging the batteries in the lifeboat. The batteries are used for starting the engine as well as for interior and exterior lighting. |
|
The ship's call sign is written in large letters on the top of the lifeboat, in order to make it visible from the air. The white crosses work as reflectors, making the boat more visible from the air during the dark hours. |
|
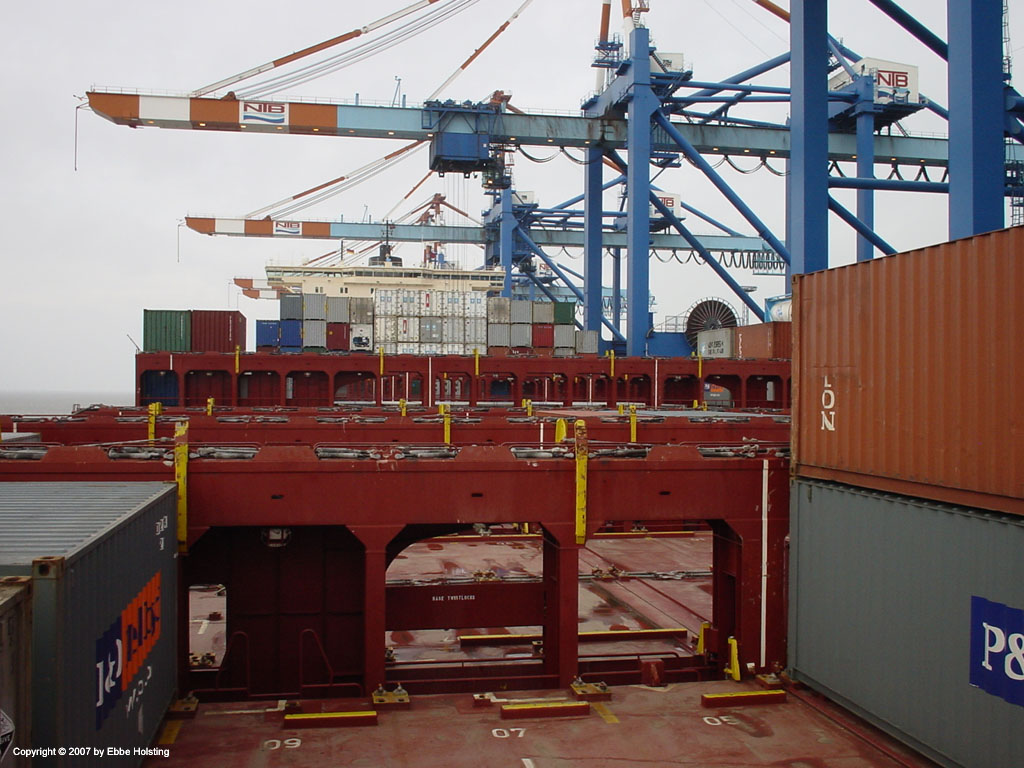
A look aftwards from one of the many lashing bridges. Lashing bridges are the athwartships red steel structures rising up from deck level, and are used for lashing the containers (securing them to the ship) Lashing equipment is visible on the bridges (grey). The vertical yellow supports protect the lashing bridges from getting damaged or dented by the hatch covers when these are lifted off and put back down. |
|
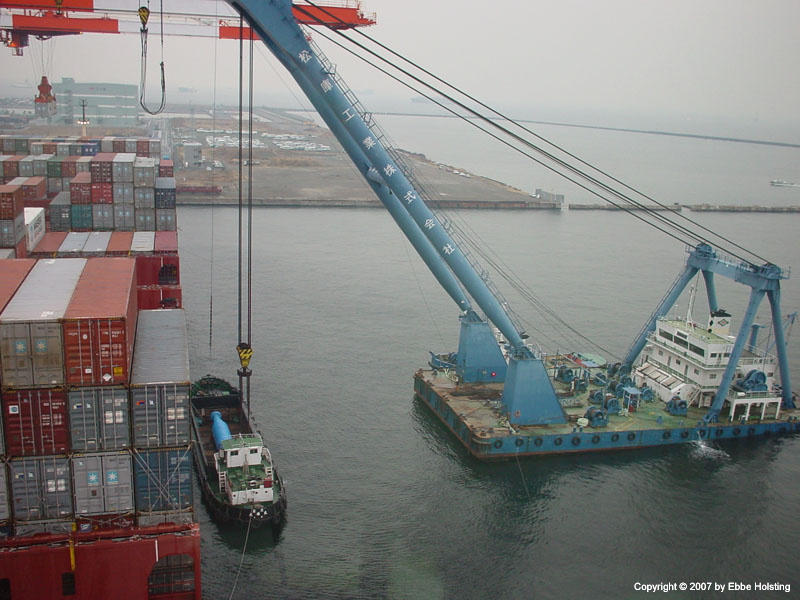
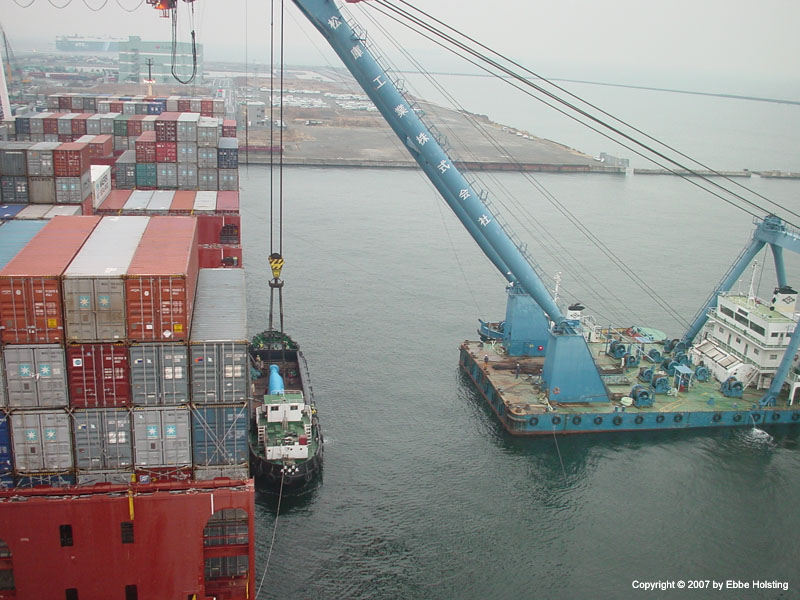
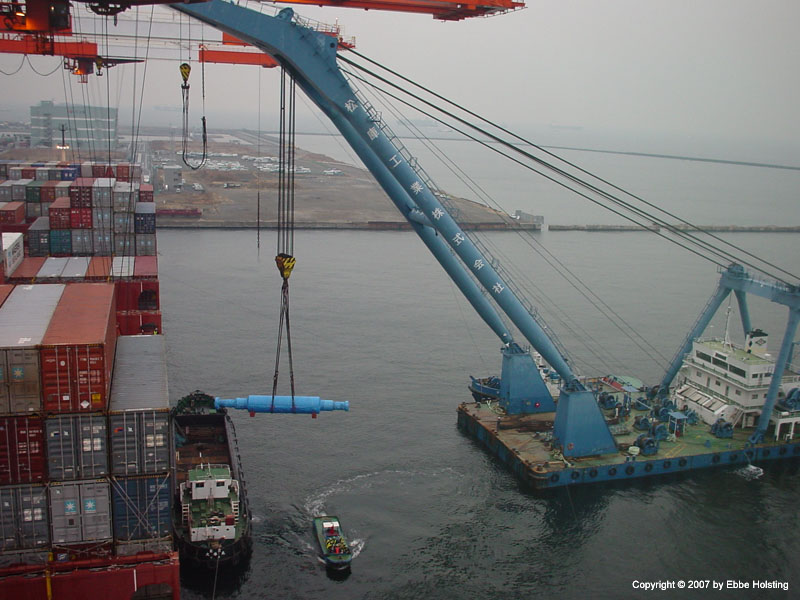
In Yokohama, Japan, we were scheduled to load a large axle for a turbine. The harbour's gantry cranes could not handle the axle, so a large floating crane was called in to assist. |
|
The smaller cargo ship transported the axle out to our vessel, and the floating crane picked it up and loaded it in a cargo hold. A gang of Japanese lashing workers then lashed it using chains and other lashing equipment. |

|
The axle was 15 meters long and weighed 230 tons! |
|
The position of the floating crane was controlled by pulling on a number of thin steel wires, some of which were attached to the Albert Maersk. The wires are just visible in this picture, one from each corner of the floating crane. |
|
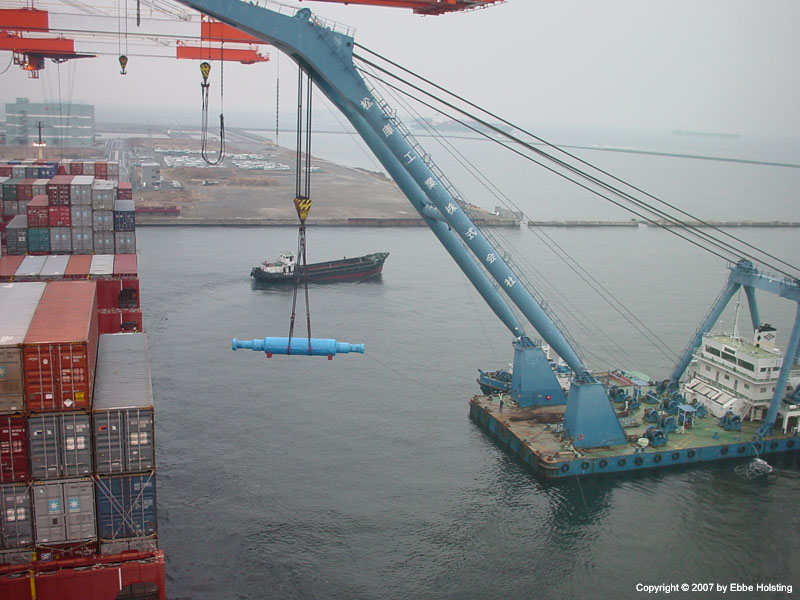
With the axle lifted clear of the little cargo ship, it left the scene, and the floating crane manoeuvered closer to our ship in order to be able to lower the axle into a cargo hold. |
|
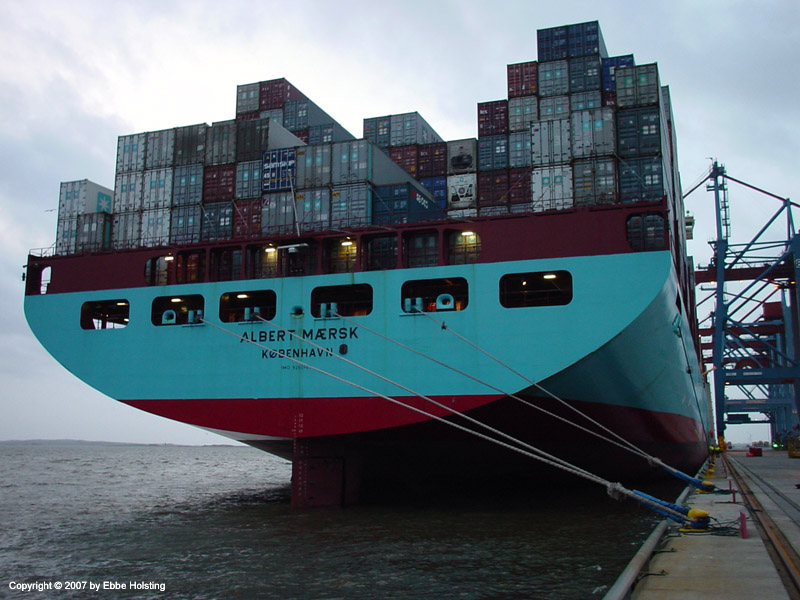
Arriving at Gothenburg, Sweden, after completing a roundtrip to the Far East. Though it would be fairly easy for me to sign on and off in Gothenburg, on this particular voyage I actually embarked the vessel in Singapore, spent 11 weeks on board, and then disembarked in Tanjung Pelepas, Malaysia. |