| CONTENTS |
| Sites |
| Front page |
| About me |
| My occupation |
| Galleries |
| Others |
| Selected links |
| Contact |
| Guestbook |
| Copyright © 2002-2010 Ebbe Holsting |
Pictures from Clifford Maersk
These pictures are from my 1st period of seagoing service with A. P. Møller where I joined the M/S "Clifford Maersk" for 3 months as a cadet. At the time when I took the pictures the M/S "Clifford Maersk" was one of the world's largest container vessels along with a larger series of sister ships. Now A. P. Moller have even larger ships in service. Clifford's principal data are as follows:
- Vessel type: Container Ship
- Built at: Odense Steel Shipyard, Denmark
- Year of construction: 1999
- Length: 346,98 meters (1138 feet)
- Width: 42,8 meters (140,4 feet)
- Max draft: 14,52 meters (47,6 feet)
- Loading capacity (deadweight): 104696 tons
- Container capacity: 8160 TEU
- Reefer capacity: 700 Units
- Main Engine: MAN B&W 12K90MC 2-stroke diesel engine
- Main Engine output: 81600 bhp at 91 rpm
- Max speed: 25 knots
The following pictures are all taken by me, Ebbe Holsting, and are copyrighted. However, should you wish to use them in any way please contact me for permission. Thank you!
|
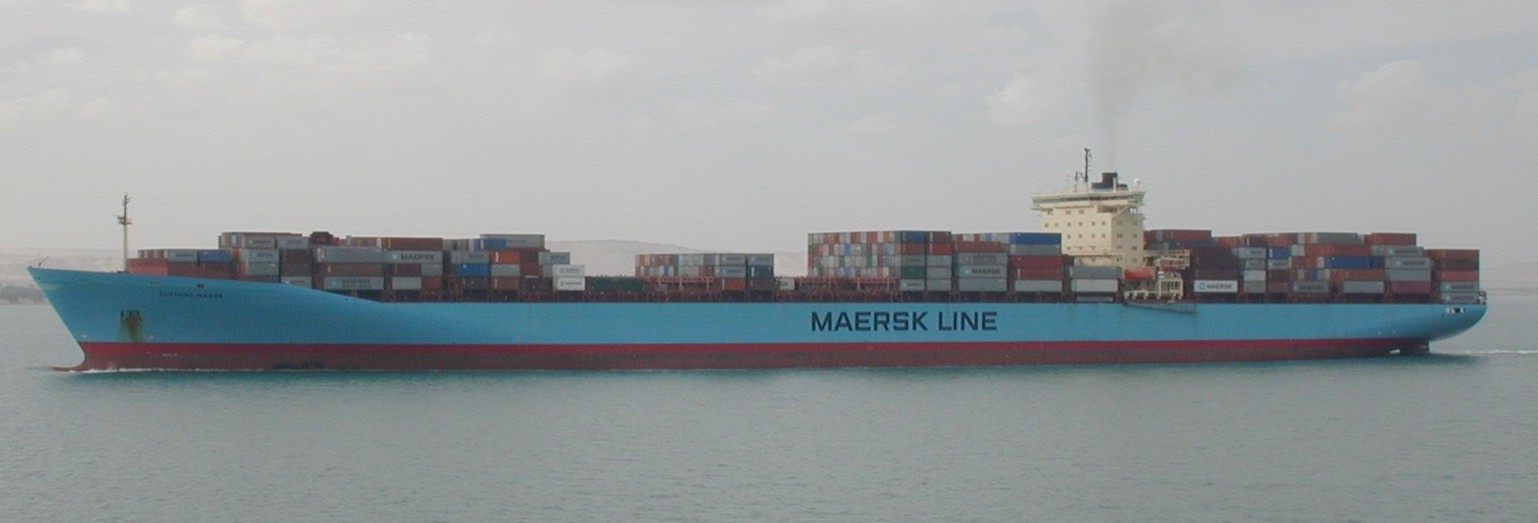
Clifford Maersk seen in full. Picture taken from Knud Maersk as we met near Hong Kong. At the time the picture was taken my twin brother was on board the Knud Maersk. |

|
Keeping a sharp lookout from the bridge is important at all times. This is done by means of radar, binochulars and pure vision. The wheel just in front of me is used for manual steering of the ship. Manual steering is used only when manouvering for instance to or from an anchor position, berth, pilot station etc. When sailing in open waters the ship is controlled by an auto pilot. |
|
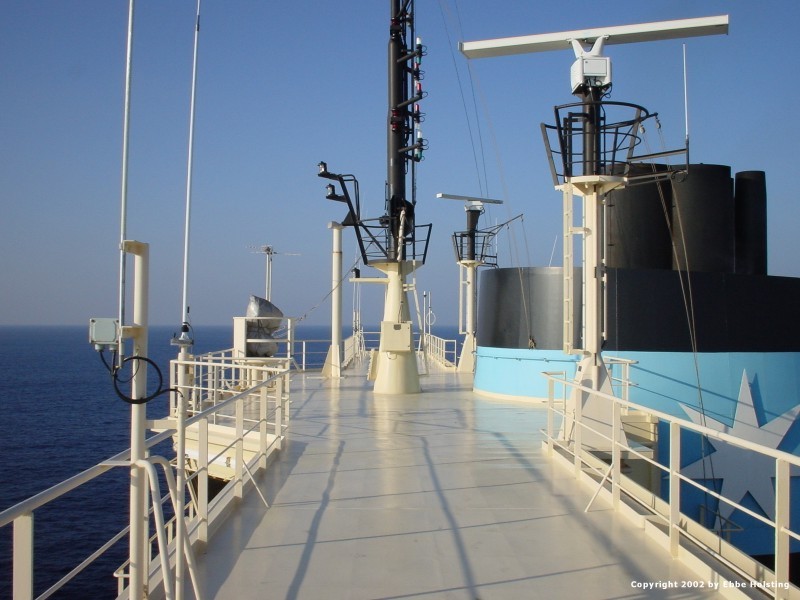
On a bright day like this Monkey Island is a good spot to enjoy the weather. Monkey Island is an every-day expression for the very top of the ships accommodation (housing). The various antennas seen include radio antennas, radar scanners and GPS receivers. |
|
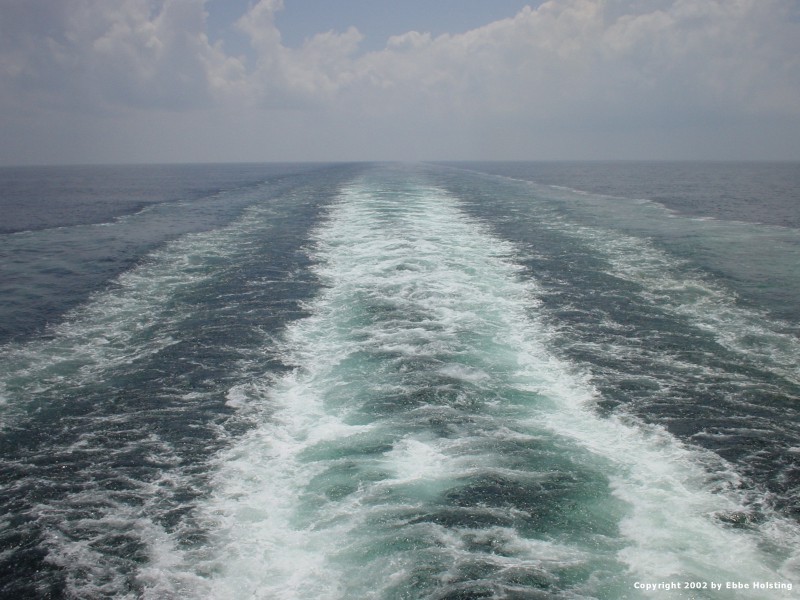
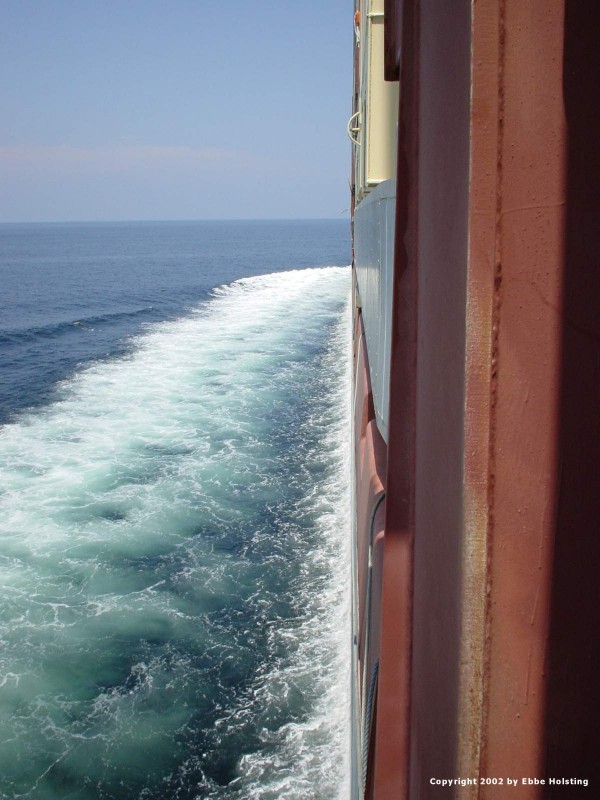
Looking back the way we came... The autopilot is quite good at keeping a steady course huh? Actually, less turbulence on the surface of the water caused by the ship indicates a better and more aqua dynamic hull and propeller design again meening less water friction. |
|
Once again looking back. This time the picture is taken from Monkey Island, and looking at the wake (trail) of the ship you can determine a turn in the distance. |
|
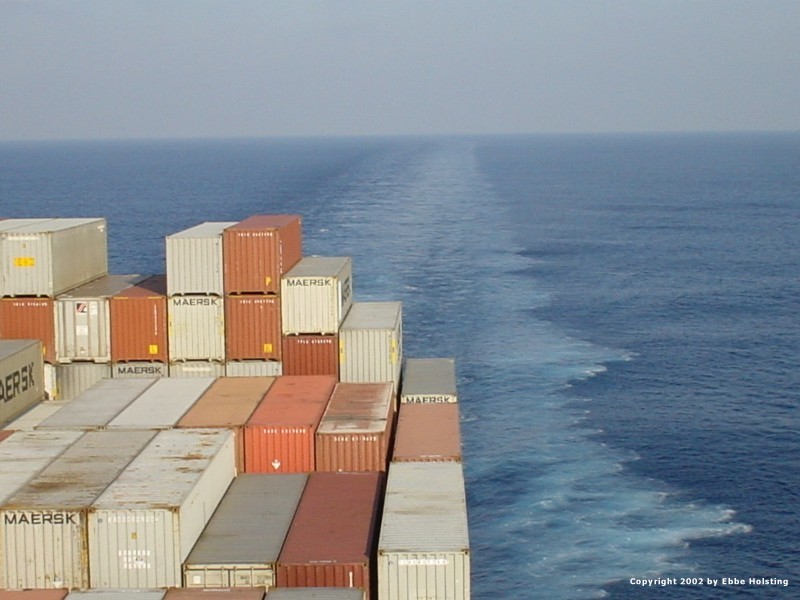
The road ahead. Sailing at full speed on a crystal clear day. Not too many other ships (if any) when sailing at open sea, but occasionally we did come accross some trafic. (Not in this picture though). The silver colored thing in the middle is the gangway which is stowed away like this when sailing. We actually see the bottom of it. |
|
The weather does get a little rough now and then, this being very little actually. It never really feals bad though as it will take some quite gigantic waves to move a ship of this size. |
|
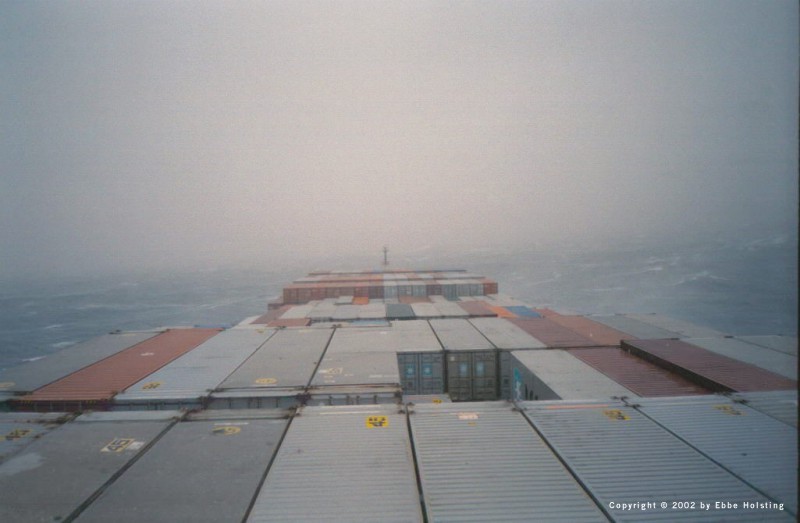
As mentioned the weather does get rough. Here we sail through a storm classified as 12 on the Beaufort scale which is the highest classification. Winds reached 80 mph! Position: northern Pacific Ocean. |

|
Another picture from the same situation as above. All personnel had to stay inside due to danger of being washed overboard. No damage was sustained during the passage of this storm. A representative from the Danish Meteorological Institute had disembarked the ship in the last harbor after passing the Pacific the other way only witnessing deep blue skies. I guess he would have wanted to experience this instead. |
|
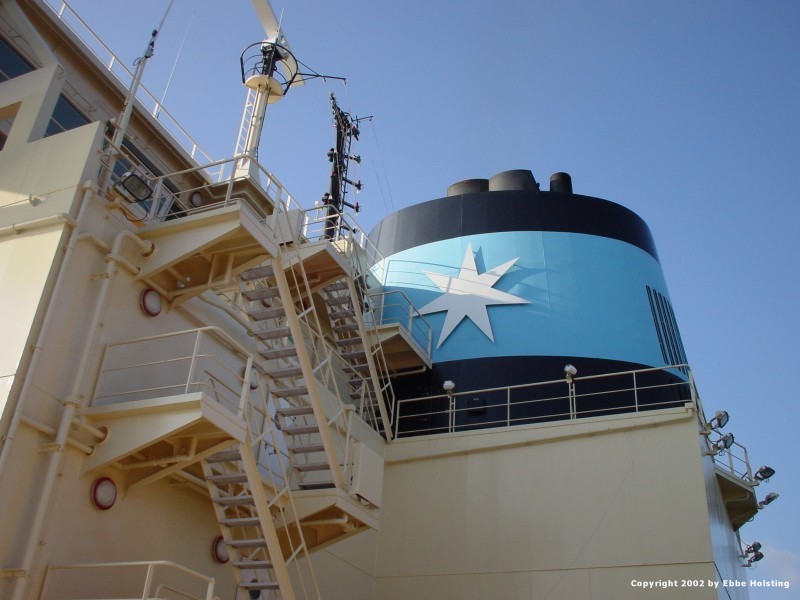
The back side of the accommodation with the A. P. Moller star on the funnel. Picture taken while in harbour which explains the lack of smoke coming out of the funnel. The black mast in front of the funnel is the so called 'Christmas Tree' carrying the navigational lights. |
|
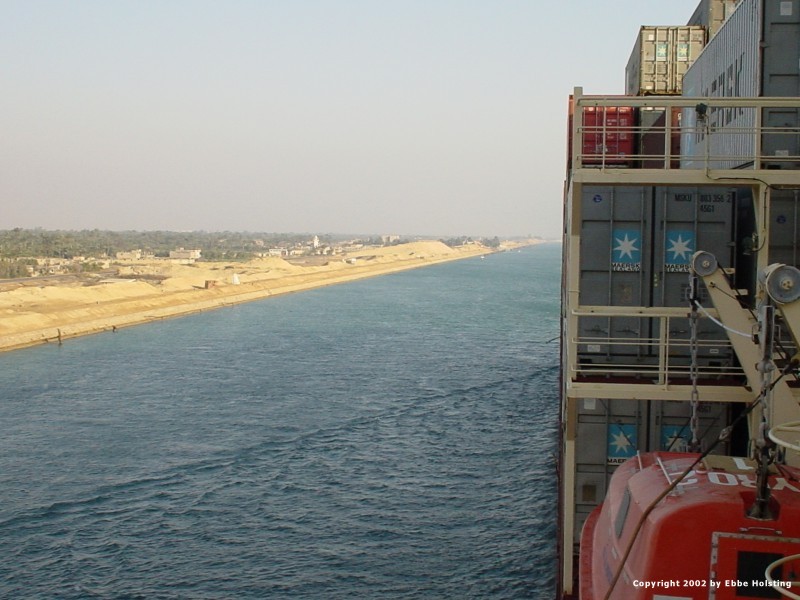
Passing through the Suez Channel looks like walking on a line, but today's advanced navigational systems and well trained helmsmen make it very safe. I also tried steering the ship by hand (also here in the channel) and it really isn't as difficult as it may seem. |

|
Another look at the Suez Channel. Here we arrive at a lake in the middle of the channel where ships going the other way anchor up while waiting for the other convoy to pass. |
|
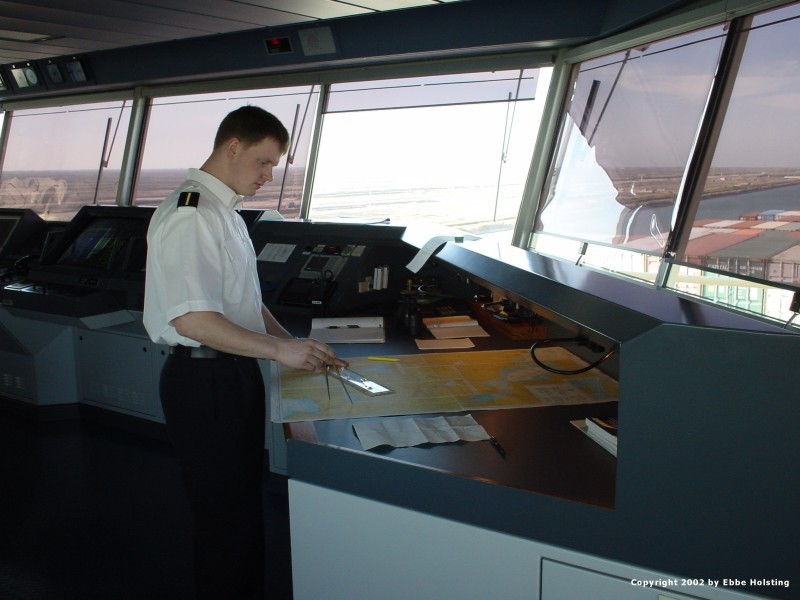
Chart work is done at all times, here by my fellow cadet Hasse. He kept track of our position throughout the passage of the channel plotting our exact position every 15 minutes. I was in the engine room at the time of the passage but just had time to pay a visit to the bridge. |
|
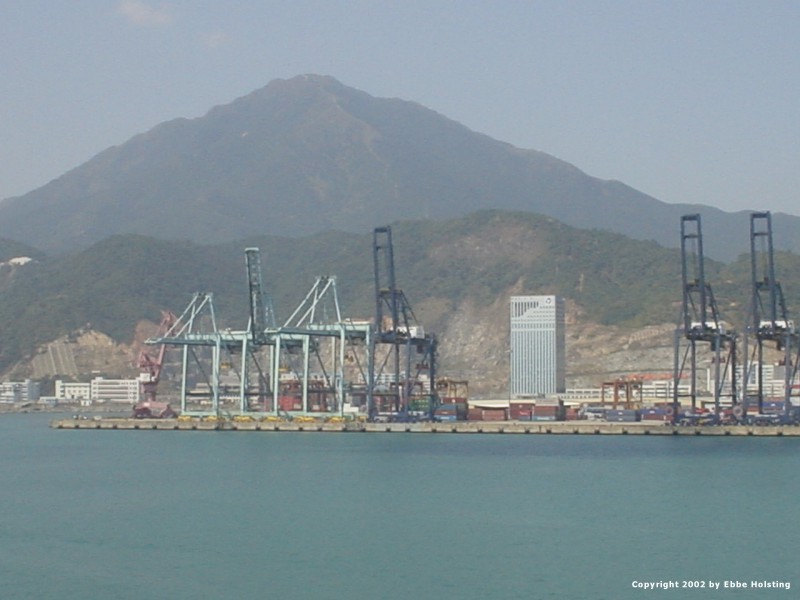
Arriving at Yokohama with the famous Yokoshima mountain towering in the distance. Ports in Japan and other far-eastern nations are usually very effective, and the duration of a port stay is often as little as 6 to 8 hours. |
|
At berth in Kobe, Japan, I had crawled up to the top of the foremast to replace a lightbulb in some navigational lights. I didn't miss the chance to bring my camera though... The mast shivered quite a lot every time a container was placed onto the ship. |
|
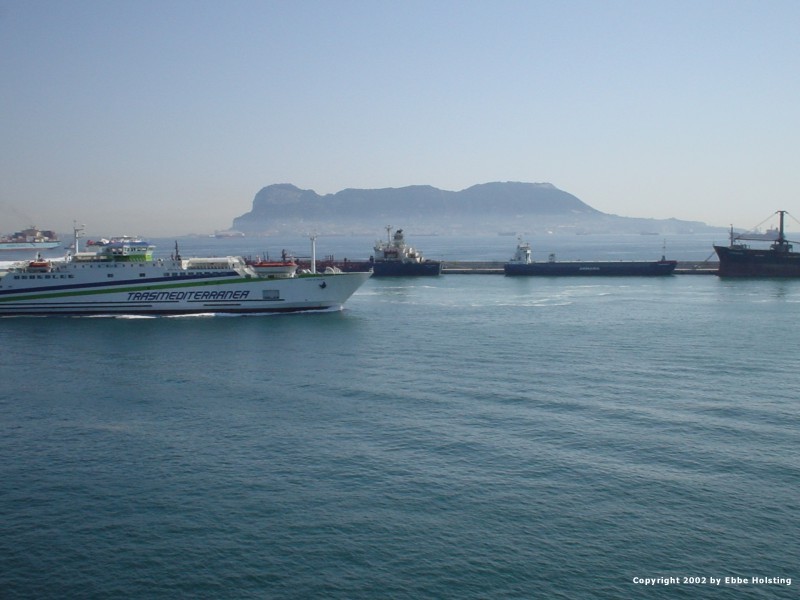
At berth in Algeciras, the main container terminal of Maersk Sealand, we here take a look at the famous cliff of Gibraltar. Another Maersk ship coming in (left side of the picture. Later proved to be Maersk Dublin.) |
|
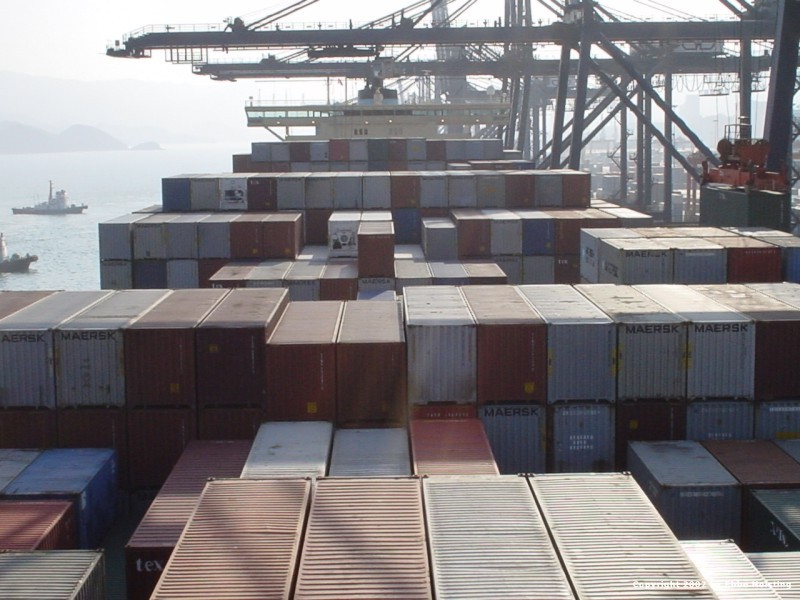
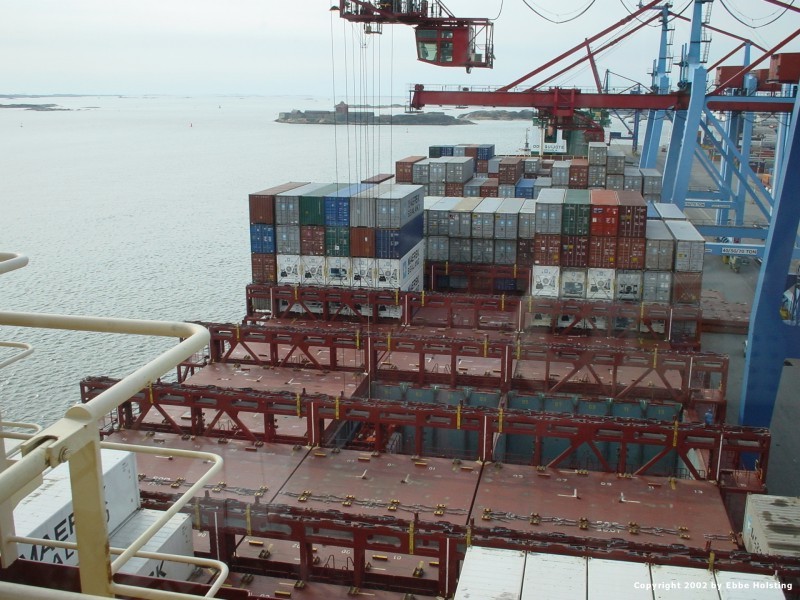
Gantry Cranes working the front deck (actually below deck) at berth in Gothenburg, Sweden. Few Maersk vessels call Gothenburg nowadays as the Aarhus terminal in Denmark is taking over as the leading Scandinavian port. |
|
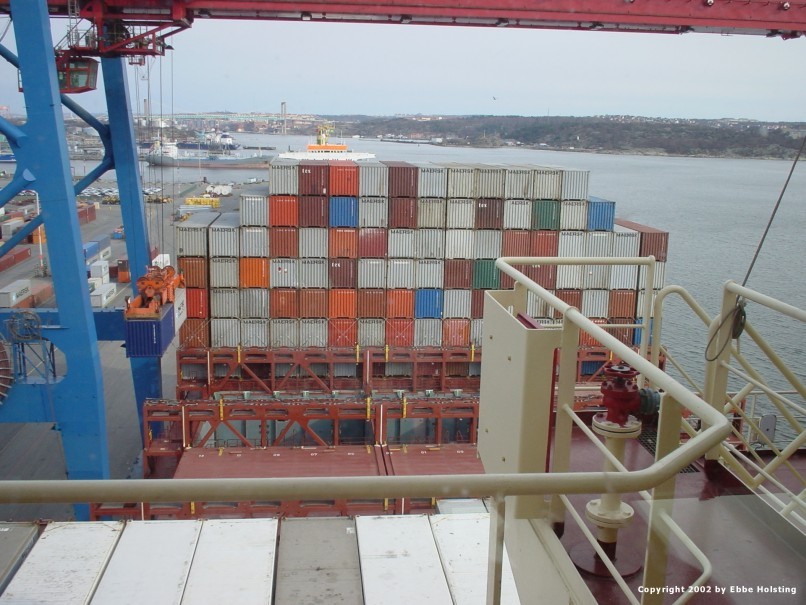
Also cranes working abaft of the accommodation. Still Gothenburg. |
|
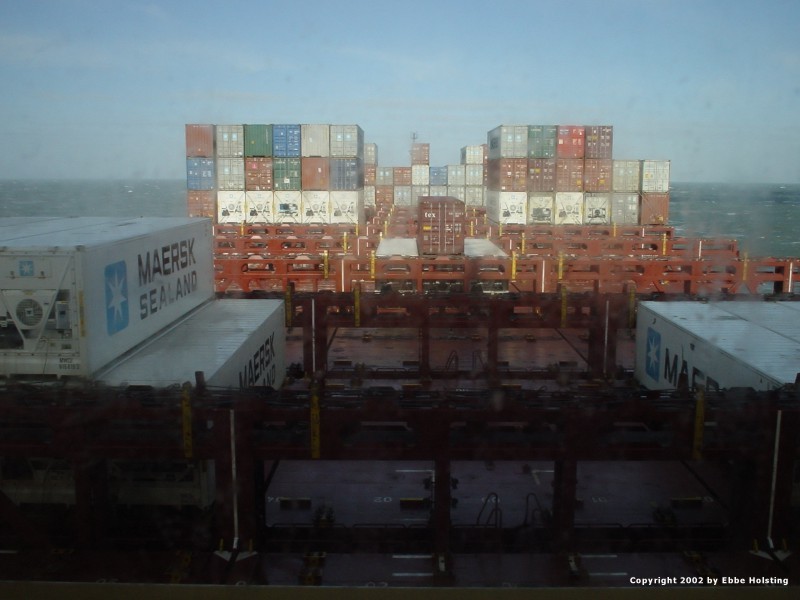
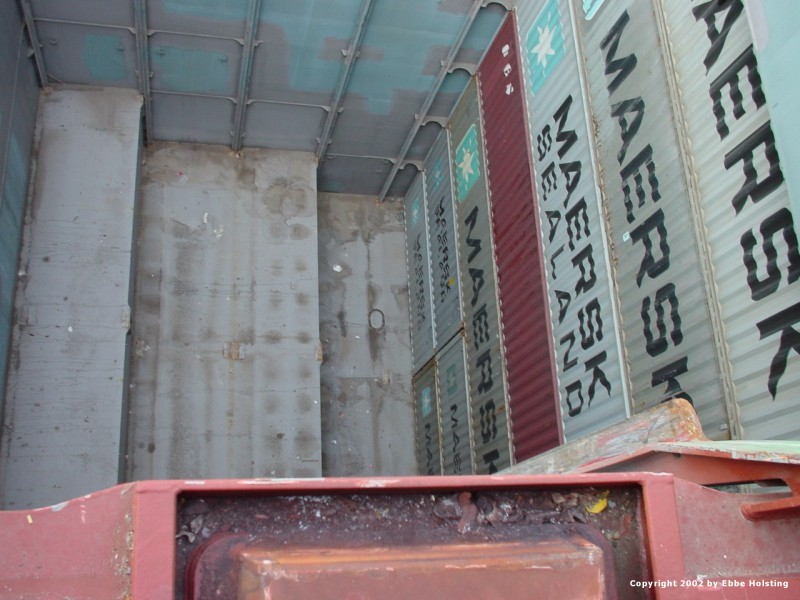
Looking down into one of the many cargo holds. The picture is taken from deck level, so there is quite a way down to the bottom! The little round cover on the bottom is about 2˝ feet on the longest side. |
|
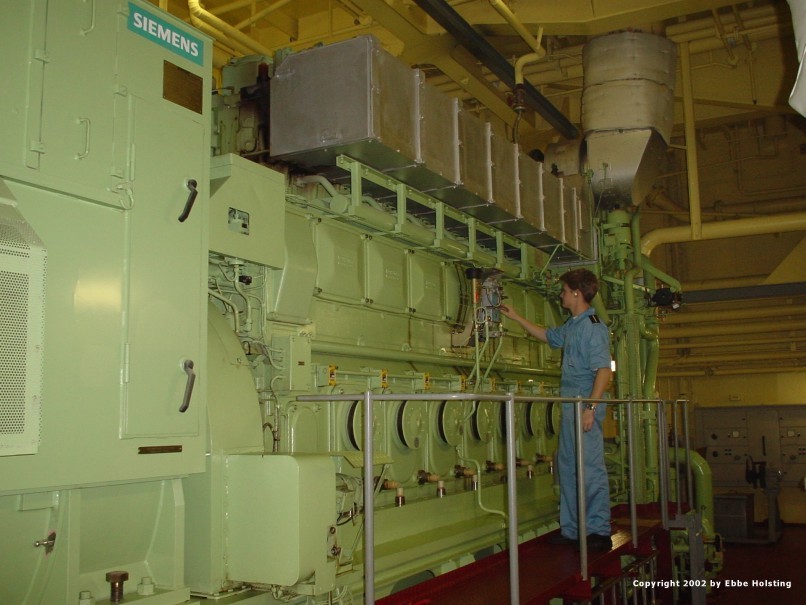
Moving into the engine room we here have a look at Clifford's Main Engine. At full speed it has an output of 81600 break horse power! (A standard car will have about 100.) The grey upright cylinders are fuel pumps whilst the green ones to the left of them are the cylinder covers. The sound of the engine running at full speed can be heard here! |

|
Another look at the main engine, this time from the 2nd deck so we can overview the top part of the engine (actually there are 4 floors of engine below what is seen). The big cylindrical tank to the left of the cylinder covers is the exhaust receiver where the exhaust gasses are gathered and enter the 3 turbo chargers. |
|
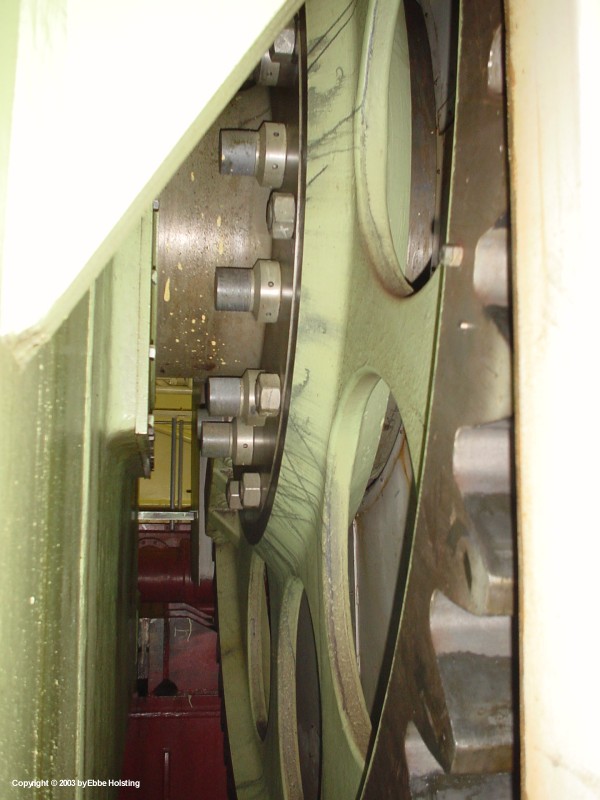
The flywheel of the main engine! Photographed whilst the engine was spinning at full speed. The reason for the flywheel being a gear wheel is to provide a means of manually turning the engine. This is done with a little electical motor mounted beside the flywheel and driving a small gear wheel interacting with the teeth on the flywheel. |
|
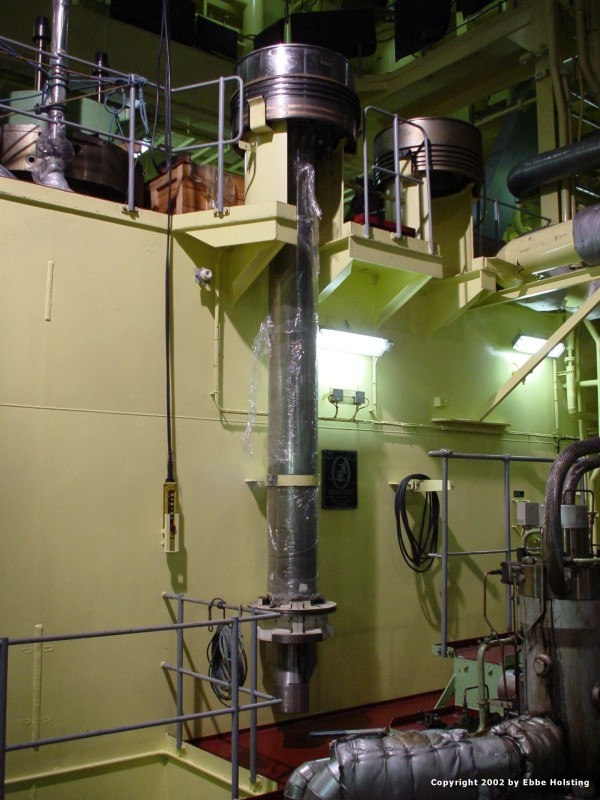
A spare piston for the main engine is always on board. I participated in changing one of these pistons, and the operation took 16 hours (much of the time used for working on the cylinder liner). |
|
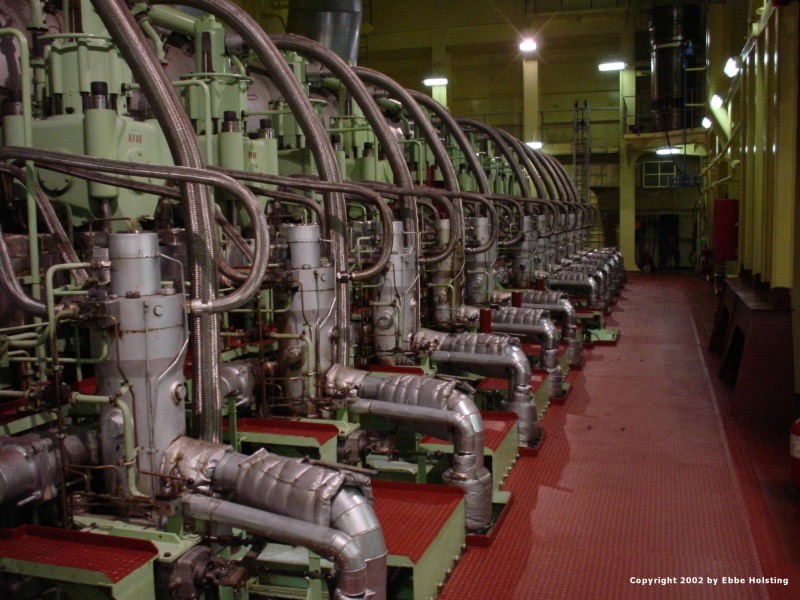
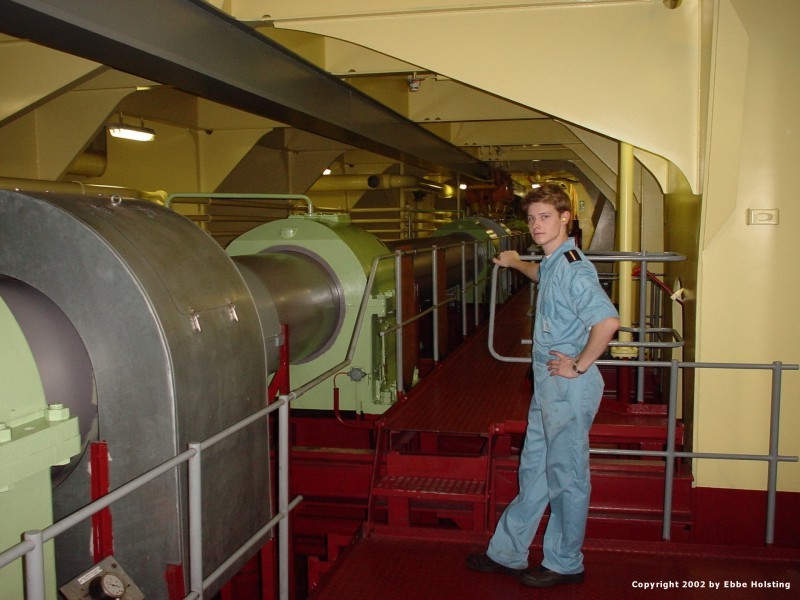
Me operating one of the five auxillary engines on board. These engines generate all power used on board (for reefer (cooling) containers mainly, but also all other power including the chief cook's oven to mention one.) Each of these engines generates 3000 kW. |
|
Me standing beside the propeller shaft running from the main engine (obviously) and abaft. 81600 horse power rotating right there.. |

|
All the way down in the bottom of the ship it is fitted with two retractable stabilizer arms, one in each side. Each of these stabilizers is driven by an enourmous hydraulical cylinder, here seen in the middle of the picture. The stabilizers are extracted when sailing in rough seas and are quite effective. However they tend to slow the ship down a bit. |